[AI绘图] OmniGen2:开源版Flux.1 Kontext图片修改神器|OmniGen2: Open-source Version of Flux.1 Kontext Image Editin
OmniGen2:开源版Flux.1 Kontext通过文字修改图片,效果比之前其他开源的好(OmniConsistency、BAGEL),单图编辑的效果非常好,多图编辑的效果也还行。 博主亲自测试在风格理解,图片修改方面效果真的不错。本文将深入介绍 OmniGen2 的强大功能,包括其卓越的视觉理解、文本到图像生成、指令引导的图像编辑能力,并提供详细的安装教程、配置要求和实用技巧。无论您是开发者还是AI爱好者,OmniGen2 都能为您开启可控、个性化AI生成的新大门。立即了解如何配置和使用这个强大的工具,将您的创意变为现实。
项目介绍:
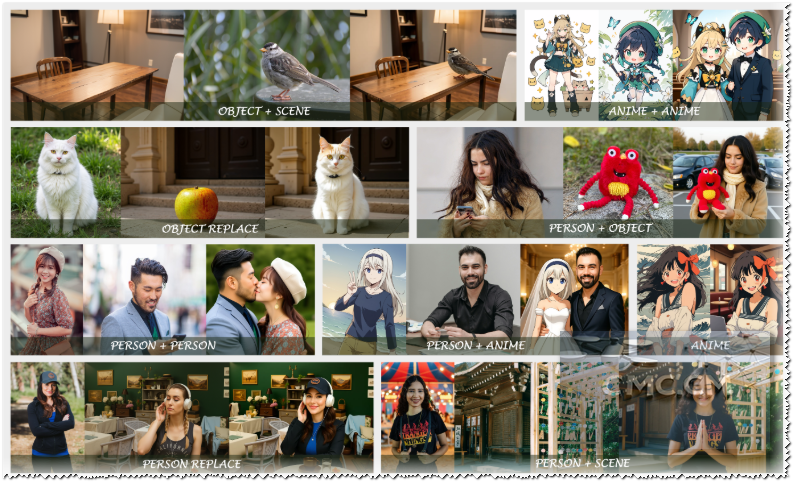
OmniGen2是一个强大而高效的统一多模态模型。与 OmniGen v1 不同,OmniGen2 针对文本和图像模态提供了两种不同的解码路径,利用非共享参数和解耦的图像分词器。OmniGen2 在以下四个主要功能方面表现出色:
- **视觉理解 (Visual Understanding)**:从其 Qwen-VL-2.5 基础继承了解释和分析图像内容的强大能力。
- **文本到图像生成 (Text-to-Image Generation)**:根据文本提示创建高保真且美观的图像。
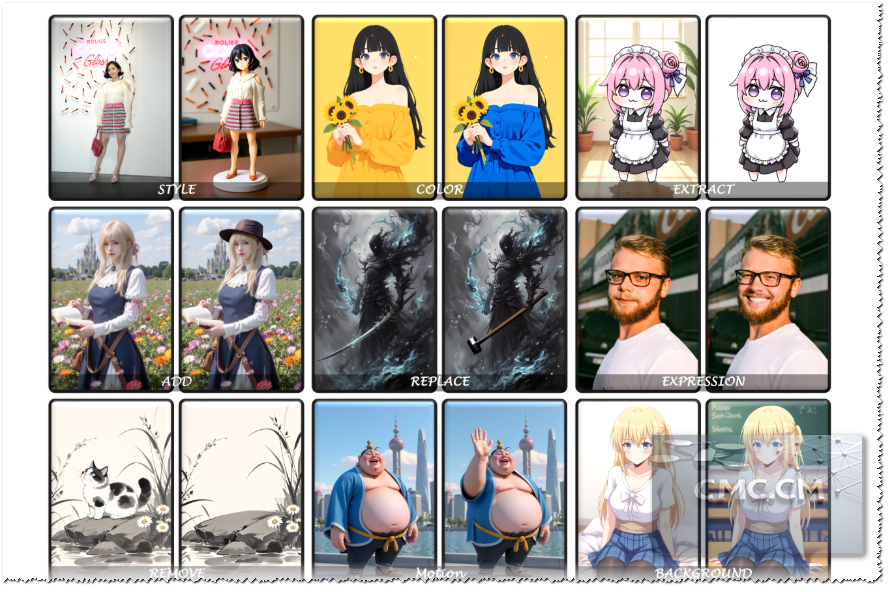
- **指令引导的图像编辑 (Instruction-guided Image Editing)**:以高精度执行复杂的、基于指令的图像修改,在开源模型中实现最先进的性能。
- **上下文生成 (In-context Generation)**:一种多功能的能力,可以处理和灵活组合不同的输入(包括人类、参考对象和场景),以产生新颖且连贯的视觉输出。
作为一个开源项目,OmniGen2 为探索可控和个性化生成 AI 前沿的研究人员和开发人员提供了强大且资源高效的基础。
效果演示 (Demonstration)
项目地址:
注意:论文地址里面有具体的用法,可以下载下来好好看看。
- 项目地址 (Project Links): huggingface | Git.io | Github | 论文地址 (Paper)
推荐配置
OmniGen2 原生需要 NVIDIA RTX 3090 或同等级别的 GPU,并配备约 17GB 的 VRAM。对于 VRAM 较少的设备,您可以启用 CPU 卸载 (CPU offload) 来运行模型。
**性能提示 (Performance Tip)**:为了提高推理速度,可以考虑降低该 cfg_range_end 参数。在合理范围内,这对输出质量的影响可以忽略不计。
| Input Composition | CFG Range | No Offload (Time (s)) | No Offload (Mem. (GB)) | Model Offload (Time (s)) | Model Offload (Mem. (GB)) | Sequential Offload (Time (s)) | Sequential Offload (Mem. (GB)) |
|---|---|---|---|---|---|---|---|
| Text-only | [0, 1.0] | 26.05 | 17.15 | 33.44 | 7.92 | 172.96 | 2.40 |
| (纯文本) | |||||||
| Text-only | [0, 0.6] | 21.16 | 17.15 | 28.22 | 7.92 | 134.80 | 2.40 |
| (纯文本) | |||||||
| Text + 1 Image | [0, 1.0] | 66.69 | 17.15 | 76.22 | 8.80 | 283.06 | 2.40 |
| (文本 + 1 张图片) | |||||||
| Text + 1 Image | [0, 0.6] | 51.98 | 17.15 | 59.60 | 8.80 | 221.55 | 2.40 |
| (文本 + 1 张图片) | |||||||
| Text + 2 Images | [0, 1.0] | 99.35 | 17.15 | 106.44 | 8.80 | 367.69 | 2.40 |
| (文本 + 2 张图片) | |||||||
| Text + 2 Images | [0, 0.6] | 77.85 | 17.15 | 83.70 | 8.80 | 221.55 | 2.40 |
| (文本 + 2 张图片) | |||||||
| Text + 3 Images | [0, 1.0] | 139.26 | 17.15 | 147.37 | 9.27 | 393.56 | 2.40 |
| (文本 + 3 张图片) | |||||||
| Text + 3 Images | [0, 0.6] | 111.21 | 17.15 | 118.69 | 9.27 | 283.98 | 2.40 |
| (文本 + 3 张图片) |
表1:OmniGen2 在 A800 GPU 上使用 bfloat16 的计算效率。所有结果均在固定 1024 × 1024 分辨率(输出和输入,如适用)以及 50 个采样步长的条件下进行基准测试。
项目安装:
对于普通用户
# 1. Clone the repo
git clone git@github.com:VectorSpaceLab/OmniGen2.git
cd OmniGen2
# 2. (Optional) Create a clean Python environment
conda create -n omnigen2 python=3.11
conda activate omnigen2
# 3. Install dependencies
# 3.1 Install PyTorch (choose correct CUDA version)
pip install torch==2.6.0 torchvision --extra-index-url https://download.pytorch.org/whl/cu124
# 3.2 Install other required packages
pip install -r requirements.txt
# Note: Version 2.7.4.post1 is specified for compatibility with CUDA 12.4.
# Feel free to use a newer version if you use CUDA 12.6 or they fixed this compatibility issue.
# OmniGen2 runs even without flash-attn, though we recommend install it for best performance.
pip install flash-attn==2.7.4.post1 --no-build-isolation
对于中国大陆用户(For Users in Mainland China)
# Install PyTorch from a domestic mirror
pip install torch==2.6.0 torchvision --index-url https://mirror.sjtu.edu.cn/pytorch-wheels/cu124

# Install other dependencies from Tsinghua mirror
pip install -r requirements.txt -i https://pypi.tuna.tsinghua.edu.cn/simple

# Note: Version 2.7.4.post1 is specified for compatibility with CUDA 12.4.
# Feel free to use a newer version if you use CUDA 12.6 or they fixed this compatibility issue.
# OmniGen2 runs even without flash-attn, though we recommend install it for best performance.
pip install flash-attn==2.7.4.post1 --no-build-isolation -i https://pypi.tuna.tsinghua.edu.cn/simple
运行实例 (Running Examples)
# Visual Understanding
bash example_understanding.sh
# Text-to-image generation
bash example_t2i.sh
# Instruction-guided image editing
bash example_edit.sh
# In-context generation
bash example_in_context_generation.sh
GUI运行实例 (Running Examples)
# for only generating image
pip install gradio
python app.py
# Optional: Share demo with public link (You need to be able to access huggingface)
python app.py --share
# for generating image or text
pip install gradio
python app_chat.py
注意事项:
使用提示
- 为了获得最佳的 OmniGen2 结果,您可以根据您的具体用例调整以下关键超参数。
num_inference_step: 每次生成的采样步数。较高的值通常会提高质量,但也会增加生成时间。- **推荐范围 (Recommended range)**:28 到 50
num_inference_step: The number of sampling steps per generation. Higher values generally improve quality but increase generation time.- Recommended range: 28 to 50
text_guidance_scale: 控制输出对文本提示的严格程度(无分类器指导)。- **对于文生图 (For Text-to-Image)**:对于简单或细节较少的提示,使用较高的值(例如,6-7)。对于复杂且高度详细的提示,使用较低的值(例如,4)。
- **对于编辑/合成 (For Editing/Composition)**:建议使用中等值,大约 4-5。
text_guidance_scale: Controls how strictly the output adheres to the text prompt (Classifier-Free Guidance).- For Text-to-Image: Use higher values (e.g., 6-7) for simple or less detailed prompts. Use lower values (e.g., 4) for complex and highly detailed prompts.
- For Editing/Composition: A moderate value of around 4-5 is recommended.
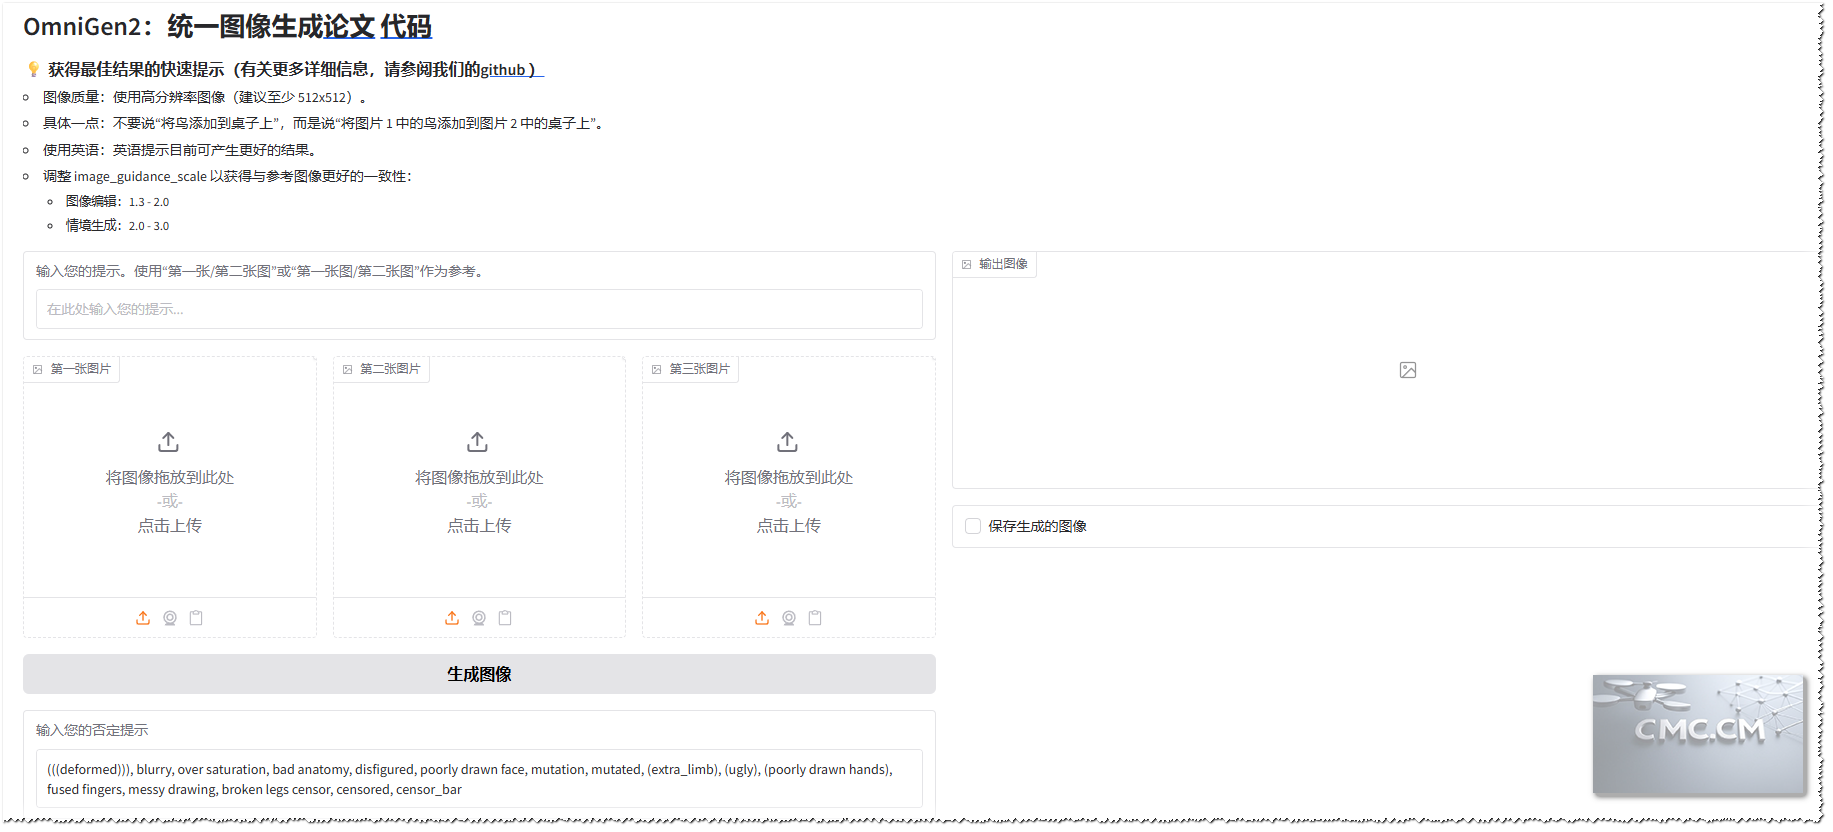
image_guidance_scale: 这控制了最终图像与输入参考图像的相似程度。- **权衡 (Trade-off)**:较高的值(约 2.0)使输出更忠实于参考图像的结构和风格,但它可能会忽略部分文本提示。较低的值(约 1.5)使文本提示有更大的影响力。
- **提示 (Tip)**:从 1.5 开始,如果需要与参考图像更一致,可以逐渐增加该值。对于图像编辑任务,我们建议将其设置在 1.3 到 2.0 之间;对于上下文生成任务,较高的
image_guidance_scale将保留输入图像中的更多细节,我们建议将其设置在 2.5 到 3.0 之间。
image_guidance_scale: This controls how similar the final image is to the input reference image(s).- Trade-off: A higher value (around 2.0) makes the output more faithful to the structure and style of the reference image but may ignore parts of the text prompt. A lower value (around 1.5) gives the text prompt more influence.
- Tip: Start at 1.5 and gradually increase if you need more consistency with the reference image. For image editing tasks, we recommend setting it between 1.3 and 2.0; for in-context generation tasks, a higher
image_guidance_scalewill preserve more details from the input images, and we recommend setting it between 2.5 and 3.0.
max_pixels: 当图像的总像素数(宽度 × 高度)超过此限制时自动调整图像大小,同时保持其宽高比。这有助于管理性能和内存使用。max_pixels: Automatically resizes an image when its total pixel count (width × height) exceeds this limit, while maintaining its aspect ratio. This helps manage performance and memory usage.max_input_image_side_length: 输入图像的最大边长。max_input_image_side_length: The maximum side length for an input image.negative_prompt: 告诉模型你不希望在图像中看到的内容。- **示例 (Examples)**:模糊、低质量、文字、水印
- **提示 (Tip)**:为了获得最佳效果,尝试使用不同的负面提示进行实验。如果你不确定,可以留空。
negative_prompt: Tell the model what you do not want to see in the image.- Examples: blurry, low quality, text, watermark
- Tip: For best results, experiment with different negative prompts. If you’re unsure, leave it empty.
白嫖地址 (Live Demos):
抱抱脸(需科学上网环境):传送门 一张图大概要90秒左右的时间
试用地址1:传送门
试用地址2:传送门
试用地址3:传送门
试用地址4:传送门
注意事项:
- 由于本人电脑配置不行,搭建成功了,但是速度真是非常慢(本人是9700K+2070S+32G内存)
- 个人强烈建议,用以上可以试用的地址去试试之后再去搭建。有时间我会写一篇详细用法。
- 参考图片如果是动漫,最好是风格一致。
- 注意写好提示词:这个尤为关键,建议好好看看官方文档。我这里给个例子:
需求[换脸/改风格/换衣服/换姿态/换表情/背景]
第一张图[主图/主要参考对象]
第二张图[参考表情...]
第三张图[参考物体...]
本站所有文章内容在未注明的情况下均为原创,未经允许谢绝转载。
